Monkedo
Monkedo is an intuitive no-code automation platform built for both tech-savvy and non-technical users. Its user-friendly interface allows anyone to design custom workflows using simple drag-and-drop actions—without writing a single line of code. Whether you're looking to automate everyday tasks, optimize business operations, or handle complex data workflows, Monkedo connects with hundreds of applications, giving you the power to automate nearly any process.

Monkedo is a powerful no-code automation platform designed to eliminate repetitive tasks, reduce manual workload, and minimize human error. So, how does it work?
Drag-and-Drop Automation with 400+ Apps
Monkedo offers thousands of ready-made components and integrations with over 400 popular applications. You can easily build automations by dragging components onto the visual editor and connecting them—no coding required.Data from Apps and Websites
Monkedo doesn’t just integrate apps. With our Chrome browser extension, you can scrape data directly from websites and use it in your automations—perfect for lead generation, monitoring, or real-time data use cases.Store and Reuse Data
Use Value Stores and Data Tables in Monkedo to save information and dynamically use it across different workflows. This makes your automation smarter and more adaptable.Advanced Flow Logic
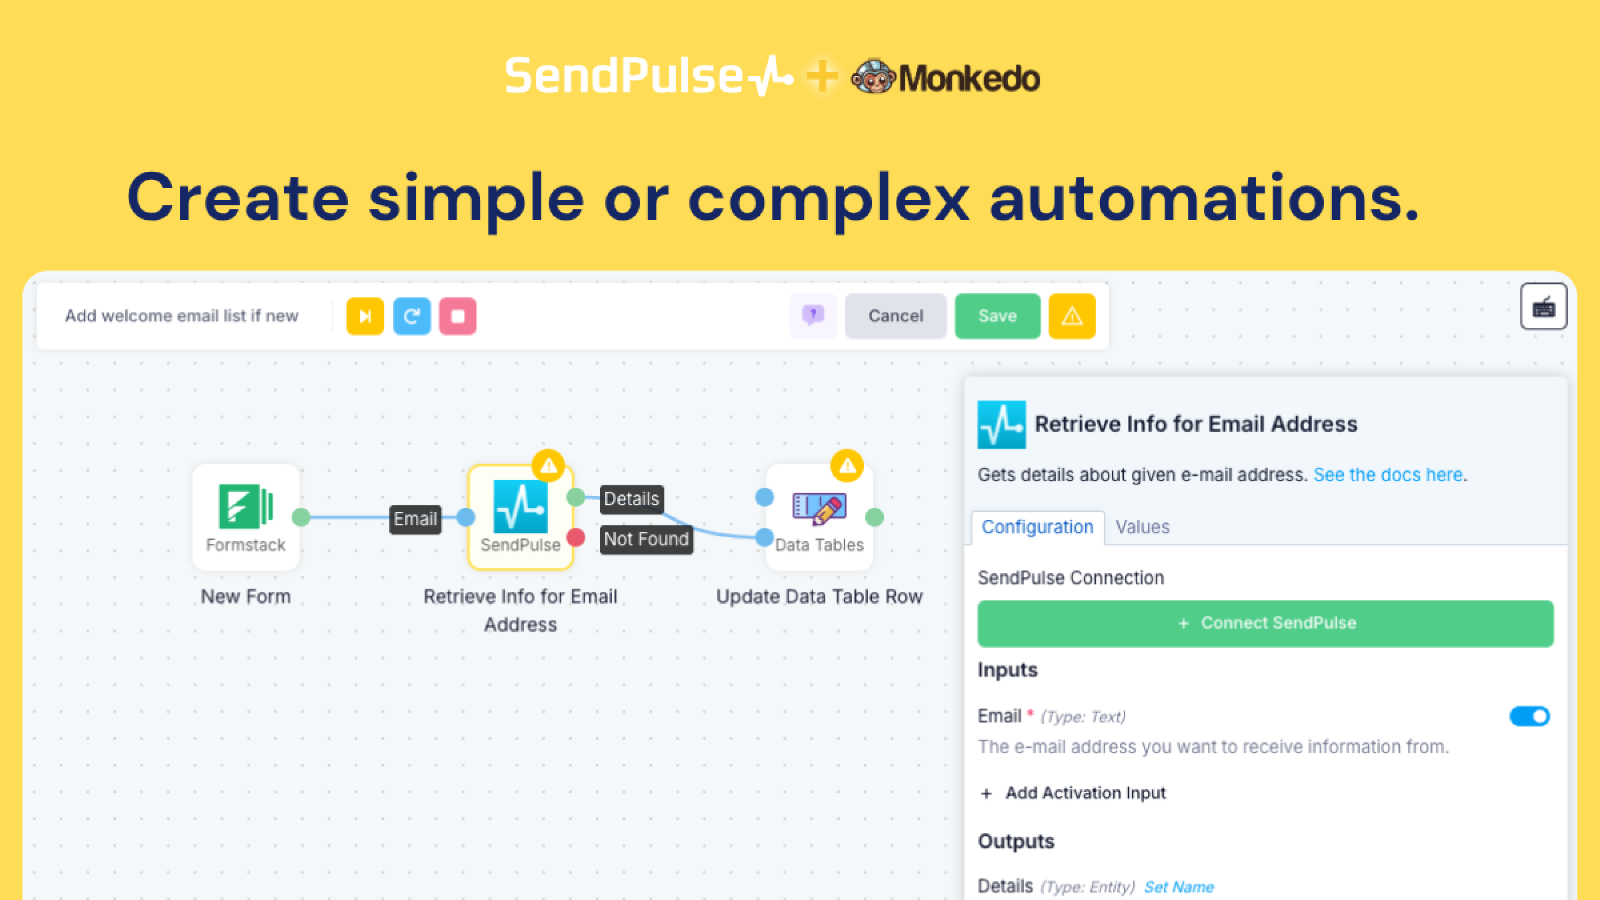
Monkedo goes beyond linear workflows. You can create advanced automations with branches, loops, conditions, and even recursive structures—giving you the flexibility to build complex logic visually.iPaaS-Level Integration for Developers
In Developer Mode, Monkedo functions like an Integration Platform as a Service (iPaaS). You can connect your own software with tools like SendPulse and deploy integrations without exposing Monkedo to your end-users. Your customers get seamless functionality—without ever seeing the Monkedo interface.
Log in to your Monkedo account.
Go to the Automation page and click the Create Automation button.
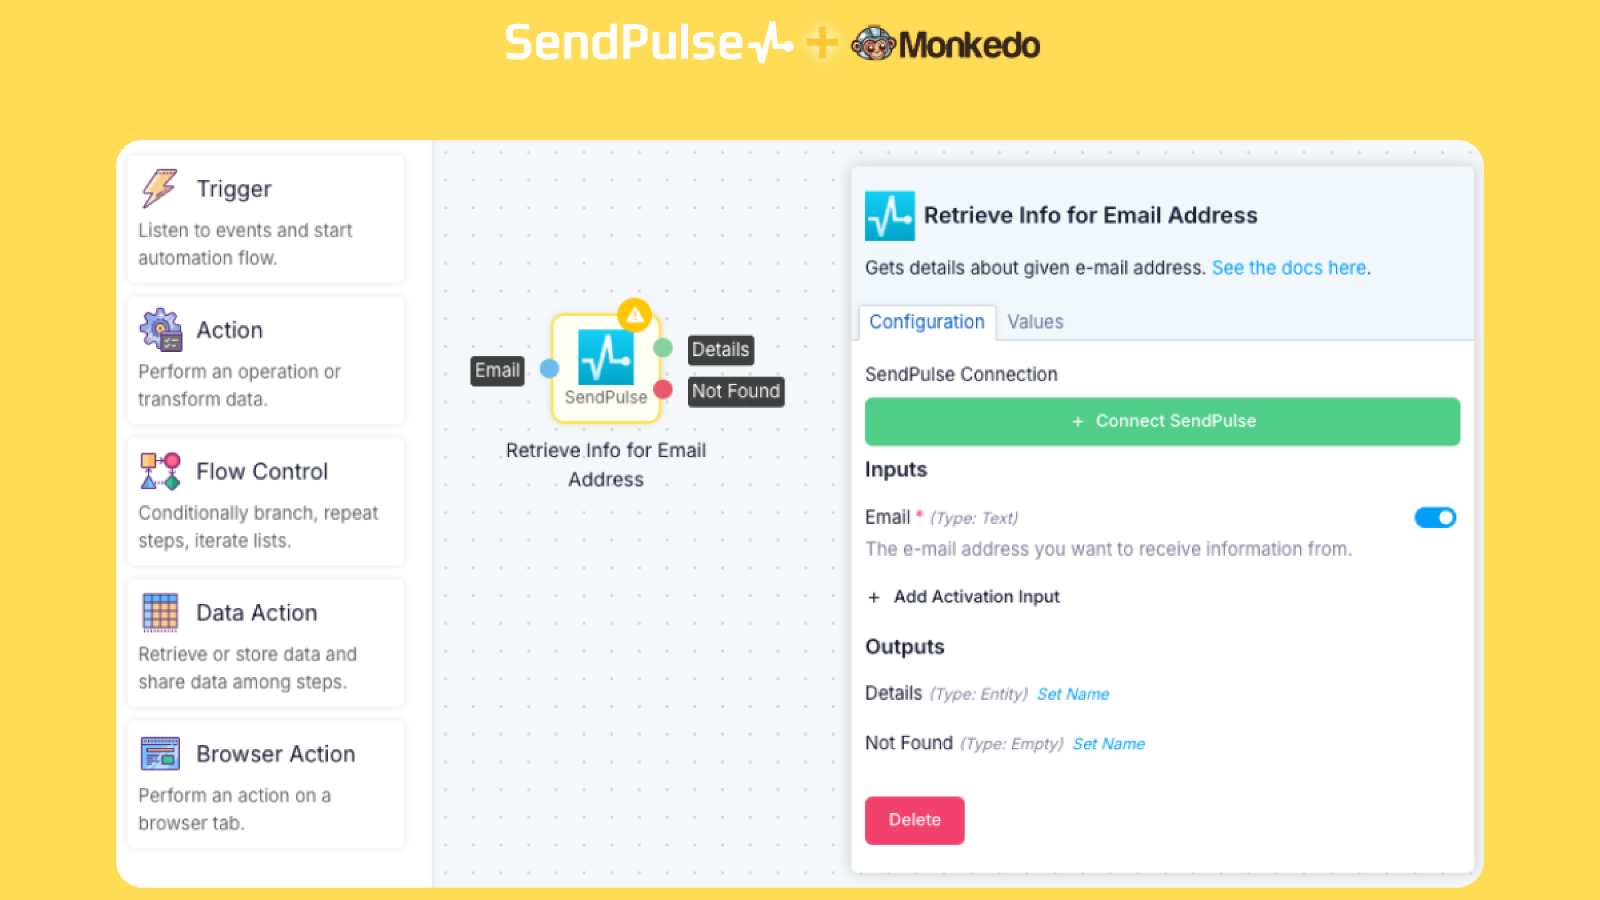
On the left panel, you’ll see component categories: Triggers, Actions, Flow Control, Data Action, and Browser Action.
Click on Actions and use the search bar to find Sendpulse.
Drag and drop your selected action component into the editor area.
Click on the component to open the info panel on the right side.
Click the Connect button and follow the steps to authorize access to Sendpulse.
You're all set! Now you can start building your automation. To set up your automation, start by entering the required values in each component. Then, add other app components to the editor as needed. Connect the output of one component to the input of another to establish a clear data flow between steps.Need help? Watch this quick tutorial video.


або